
I believe that everyone would like to know about the construction scheme of aluminum curtain wall, following the manufacturers of glass aluminum curtain wall to understand;
- Aluminum curtain wall construction preparation
- Curtain wall profile processing and installation
- Aluminum curtain wall installation
A. Aluminum curtain wall construction preparation
1. Determine the construction process:
Installation of embedded parts → measuring and setting out → installation of fixed iron code → installation of steel profile → installation of aluminum plate → sealant injection → cleaning → project acceptance
2. Preparation for construction
2.1 Before the construction of aluminum curtain wall, the specifications of the required materials and the quantity of various accessories shall be provided accurately according to the design requirements for processing.
2.2 Before construction, the quality of the main structure shall be re-checked against the skeleton design of the aluminum curtain wall.Because of the quality of the main structure, the layout of the curtain wall skeleton has a great impact.In particular, the deviation of wall perpendicularity and evenness will affect the horizontal position of the entire curtain wall.
2.3 Verify the construction drawings and field measurements in detail to ensure the perfection of design and processing.
3. Operating conditions
3.1 The warehouse is set separately on the site to prevent the incoming materials from being damaged.After entering the warehouse, the members shall be stacked on the pad wood according to the varieties and specifications.Members shall be inspected and corrected before installation. Members shall be straight and square without deformation or scratch.Unqualified members shall not be installed.
3.2 Aluminum curtain wall shall be constructed by means of scaffolding. Double-row scaffolds shall be constructed according to the height and width specified in the framework design drawings of the curtain wall.
3.3. Before installation and construction, aluminum plates and accessories shall be transported to each construction surface layer by tower crane.
4. Measuring and releasing
4.1. Type out all embedments and retest their positions and sizes.
4.2 Determine the social level width and access size of the wall on the ground floor according to the baseline.
4.3 The theodolite points up several vertical lines to determine the corner position and elevation size of the curtain wall.
4.4 Determine the Central Line of a facade according to the axis and the Central Line.
4.5 Distribution errors shall be controlled to prevent errors from accumulating when measuring pay-off.
4.6 When measuring pay-off, it shall be carried out under the condition of wind force no greater than level 4.Check the verticality of the curtain wall and the position of the column in time after setting off the line.
B. Processing and installation of curtain wall profiles
1, curtain wall profile skeleton processing
1.1. Allowable deviation of cutting length and size of various profiles is ±1mm;The allowable deviation of the beam is ±0.5mm;The allowable deviation of the mullion is ±1mm;The allowable deviation of the end bevel is -15mm.
1.2 Each processing surface shall remove burr and fly edge, and the cutting end shall not be deformed, and burr shall not be greater than 02mm.
1.3 The bolt hole shall be completed by drilling and reaming.
1.4 Requirements for screw hole size: allowable hole deviation ±0.5mm;Allowable deviation of hole spacing ±0.5mm;The cumulative deviation should not be greater than ±1mm.
1.5 The steel profile shall be processed in the workshop of the company, and shall be treated with corrosion protection after the profile is formed, cut and punched.
2. Curtain wall profile skeleton installation
2.1 The installation of aluminum curtain wall skeleton shall be carried out according to the specific location of the wiring.The installation is carried on from the bottom layer up.
2.2 Before installation, the embedded iron parts shall be cleaned first.Before measuring and wiring, the positions of embedded iron parts should be checked one by one, and the cement ash on the iron parts should be removed. Among all anchoring points, the positions that cannot meet the requirements of anchoring should be picked flat concrete so as to add embedded parts.
2.3 After the cleaning work is completed, start to install the connector.Aluminum curtain walls all skeleton facades are required on a vertical level facade.Therefore, during the construction, after all the connectors are welded with the main structure iron plate or anchored with expansion bolts, the overhanging end face must also be on the same vertical flat elevation to be guaranteed.Particular way: as a flat facade as a unit, near mullion anchor points on both sides from the top of the unit, set the main structure and mullion appropriate spacing, each set up and down a cantilever pile, iron hammer hung perpendicular with lines, find out the same vertical surface elevation, flatness, to adjust after passing the tethered to a wire taut, set facade on both sides of unit, each set iron cantilever pile, and find the floors in the iron on the pile vertical vertical leveling points.When iron piles are set in each layer, they shall be on the same level.Then, at the vertical points carved by cantilever iron piles on both sides of each floor, bolt the iron wire tensioning, weld or anchor the connecting iron parts of each mullion according to the line, so that the overhanging end face of each mullion can achieve vertical leveling.The welding between the connector and the buried plate should comply with the operation rules. The welding rod model, the height and length of the welding seam should meet the design requirements, and the inspection record should be made.After the location of welded or bolted or bolted components, rust prevention shall be carried out in a timely manner.
2.4 After the connector is fixed, x begins to install the mulligan.The accuracy and quality of mullions affect the installation quality of the whole aluminum curtain wall. Therefore, the installation of mullions is one of the key procedures of the installation of aluminum curtain wall.The allowable deviation of the distance between the plane axis of the aluminum curtain wall and the outside plane axis of the building should be controlled within 2mm.The mullions shall be bolted to the fittings and the bolts shall be of stainless steel and of sufficient length. After the nuts are fastened, the bolts shall grow out the nuts by more than 3mm.A nylon liner shall be added at the contact point between the connector and the mullion to prevent potential difference corrosion.The area of the nylon gasket must not be less than the area of the connection to the mullion.After the first layer of mulligan is installed, install the next layer of mulligan.The centerline of the mullion should be checked at all times during the installation of the mullion.Any deviation should be corrected immediately.The size of mullions is directly related to the quality of the curtain wall.Elevation deviation of mullion installation shall not be greater than 3mm;Axis deviation should not be greater than 2mm before and after, and left and right deviation should not be greater than 3mm.The elevation deviation of the adjacent two mullions shall not be greater than 3mm;The maximum elevation of the mullions in the same layer shall not be greater than 5mm;The distance deviation between adjacent mullions should not be greater than 2mm.After the mullion is adjusted and fixed, the beam can be installed.
2.5. The beam shall be installed according to the position determined by the bullet line.The most important thing when installing beams is to ensure that the beams are on the same elevation as the outer surface of the mullions.The crossbeam mullions are connected by Angle codes, which are made of galvanized iron.One limb of the Angle code is fixed on the beam and the other limb is fixed on the mullion. The strength of the fixator and the Angle code shall meet the design requirements.Expansion joints shall also be arranged between the beam and the mullions. After the beam is fixed, the expansion joints shall be sealed with silicone sealant.When installing the beam, the horizontal elevation deviation of the adjacent two beams shall not be greater than 1mm.Elevation deviation of the same floor: when the width of an aluminum curtain wall is greater than or equal to 3mm, it should not be greater than 5mm;When the width of an aluminum curtain wall is greater than 35m, it should not be greater than 7mm.The installation of beams shall be carried out from bottom to top.When the installation of a floor height, should be checked, adjusted, calibration, to make it in accordance with the quality standards.
C. Installation of aluminum curtain wall
1. After the aluminum plate is combined with the side frame, the installation on the main frame shall begin.
2. The width of the joint between the plates shall be determined according to the design. Before installing the plate, pull out two through lines on the mullet, fix the position of the joint between the plates and install the plate according to the position of the line.Small elastic thread should be used when drawing the line to ensure that the plate seam is neat.
3. A layer of rubber mat should be added at the contact point between the secondary frame and the main frame, and rigid connection is not allowed.
4. After the plate is positioned, insert the two feet of the presser into the groove of the secondary frame of the plate and tighten the bolts on the presser.The number and spacing of the presses should be determined according to the design.
5. The gap between the aluminum plate and the aluminum plate is generally 10-20mm and sealed with elastic materials such as silicone sealant or rubber strip.Place the liner bar inside the vertical joint.
6. Glue injection for sealing.After the aluminum plate is fixed, the joints between the plates and other parts that need to be sealed shall be sealed with weather-resistant silicone sealant.When injecting the adhesive, the surface of the substrate should be cleaned with detergent and then injected with sealant.
7. The construction thickness of silicone sealant should be controlled within 3.5-4.5mm. If the sealant is too thin, it will guarantee the sealing quality and prevent rainwater from leaking.But also can not inject glue too thick, when the glue is pulled, too thick glue is easy to be broken, resulting in damage to the seal, anti-leakage failure.The construction width of the weatherproof silicone sealant shall not be less than two times of the thickness or according to the actual joint width.
8, weather resistant silicone sealant in the joint to form a two-sided bond, do not three side bonding.Otherwise, the glue in the tension, easy to be torn, will lose the sealing and leakage protection.Therefore, the use of polyethylene foam strip stuffing for deeper plate joints to ensure the design and construction of weather resistant silicone sealant and prevent the formation of a three-sided bond.For shallow seams, apply unbonded adhesive tape to the bottom of the seams to separate the seams from the glue before the construction of the weather-resistant silicone rubber.
9. Before injecting the adhesive, the parts to be injected should be cleaned with acetone, toluene and other cleaning agents.When using detergent, two rags should be prepared. Dip the cloth in the detergent and gently wipe the foaming dirt. Wipe the dirt and dissolved matter with the second rag.
10, glue injector must master the skills of glue injection.When injecting glue, one side should be one way to the other side, not both sides at the same time injecting glue.When injecting glue vertically, it should be injected from bottom to top.After injection, before the glue curing, the joint glue layer should be flat, without bubbles and cavities, in order to affect the adhesive and the base material bond.Glue injection should be continuous, glue seam should be uniform and full, not intermittent.
11. When injecting adhesive, the surrounding environment's humidity and temperature and other climatic conditions shall meet the construction conditions of resistant adhesive before construction can be carried out.
12. After the sealant is completely cured, remove the protective film on the surface of the aluminum plate, and a beautiful aluminum plate will be displayed in front of you.
The above is the introduction of the aluminum curtain wall construction scheme, we hope to help you to some extent. We are a professional aluminum curtain wall supplier, if you are interested in our products, please do not hesitate to consult us immediately ~
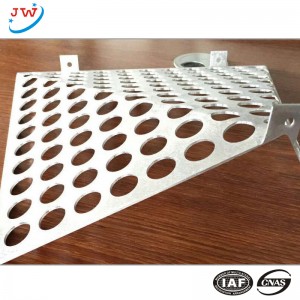
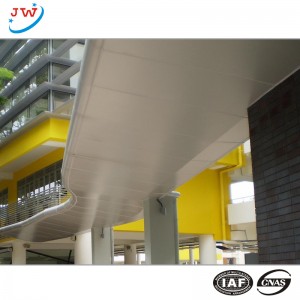
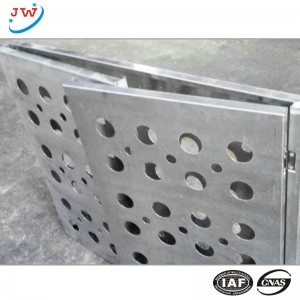
Images of aluminum curtain wall
Post time: Jan-06-2021